- Hardware Updates
- ADSBee 1090U Rev E
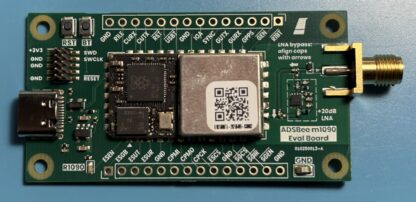
- ADSBee m1090 Eval Board
- ADSBee in Make Magazine
- Adventures in IPX5 Testing
- Firmware Updates
⚙️ Hardware Updates
🎉 ADSBee 1090U Rev E is here!
A new batch of ADSBee 1090U’s has arrived in stock, and is shipping now. These receivers have some slight tweaks compared to the last revision; one resistor value in the analog front-end has been adjusted for (theoretically) improved noise immunity, the eFuse used to power the PoE pant has been swapped for a jumper resistor (to enable powering the PoE pant without issue in hot environments like attics), and the LDO has been changed to a part that enables operation with as little as 3.7V on the 5V input. This makes the ADSBee 1090U suitable for use in projects where it’s being powered from a single cell LiPo battery (so a stable 5V may not always be available).
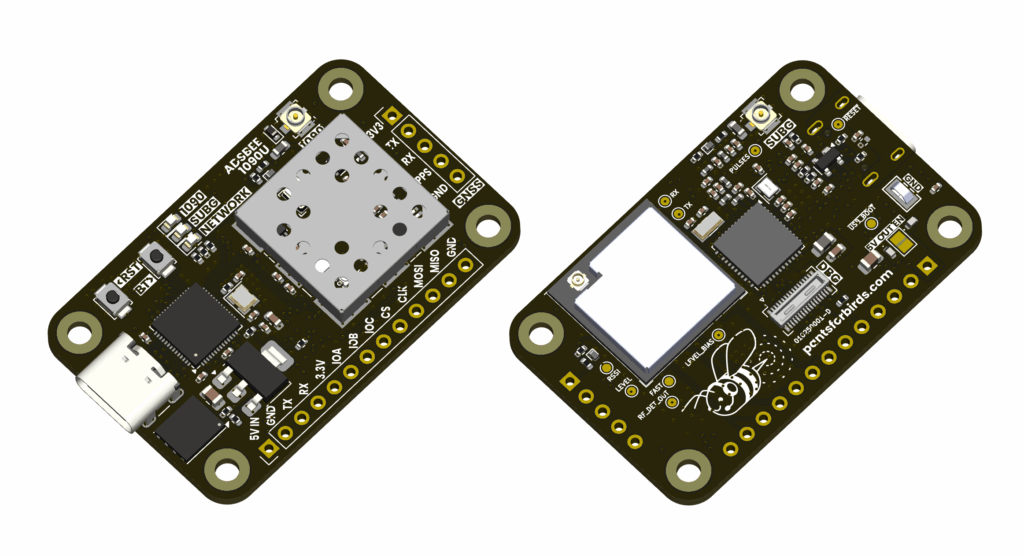
As of 2025-10-30, all ADSBee 1090U’s sold via the online store are shipping as Rev E. If you have an ADSBee 1090U Rev D, there’s no need to upgrade for the vast majority of applications. That said, it’s certainly possible to DIY an upgrade yourself with a hot air station / tweezers and some steady hands. I’m happy to provide part numbers if anyone wants to try it themselves!
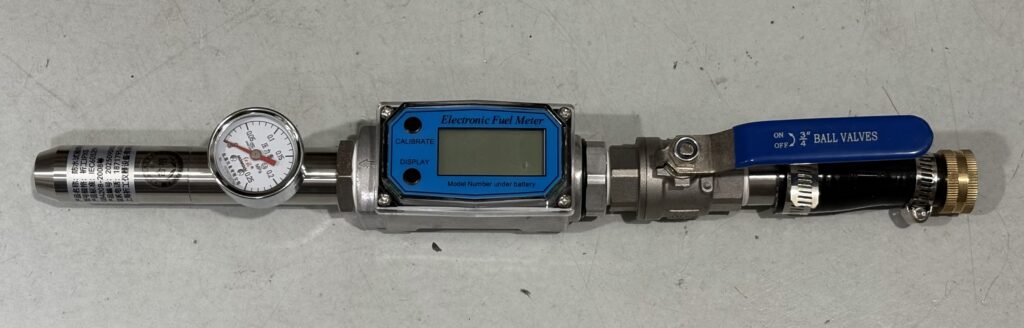
🔬 ADSBee m1090 Eval boards are available!
The ADSBee m1090 is our solder-down 1090MHz receiver module for OEM applications. It has everything needed to decode 1090MHz ADS-B (minus one of the gain stages that the 1090U has), and can be coupled with an external TI CC1312 and ESP32 to add dual-band receive and WiFi functionality, respectively.
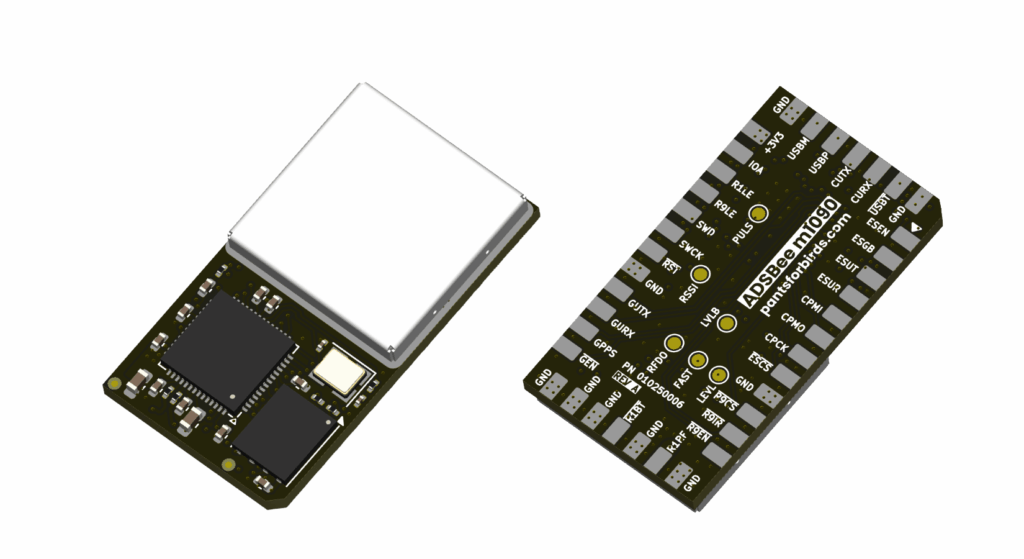
The first step in getting this module to production is building an evaluation board for developers to play around with. I’m happy to announce that said evaluation boards are now shipping! I’m assembling these boards by hand / with the assistance of a low cost pick and place machine, so they’re kind of expensive and are being added to the store in small batches as I keep up with demand. Design files for the PCB are available over Discord or email (just message me)! They’ll be publicly posted soon one things are more mature (I want to keep a tight line of communication with the first devs to use the ADSBee m1090 module).

Each m1090 Eval Board includes an ADSBee m1090 with USB C / SWD / boot / reset broken out, a 3.3V regulator, and an external Berex BLB01 LNA that can be enabled by rotating a pair of 0402 caps to put it inline with the the SMA connector. Enabling the external LNA enabled provides performance roughly on par with an ADSBee 1090U, while connecting directly to the m1090 provides performance more in line with what might be needed in an airborne application (on drones or manned aircraft).
All SPI and function pins are broken out to the edge of the m1090 eval PCB to enable connection of an external CC1312 development board or ESP32 devkit to enable Sub-GHz receive and WiFi functionality.
ADSBee m1090 Eval Board
Evaluation board for the ADSBee m1090 module. PCBA includes m1090 module + external LNA only, does not include sub-GHz radio or ESP32.
1 in stock (can be backordered)
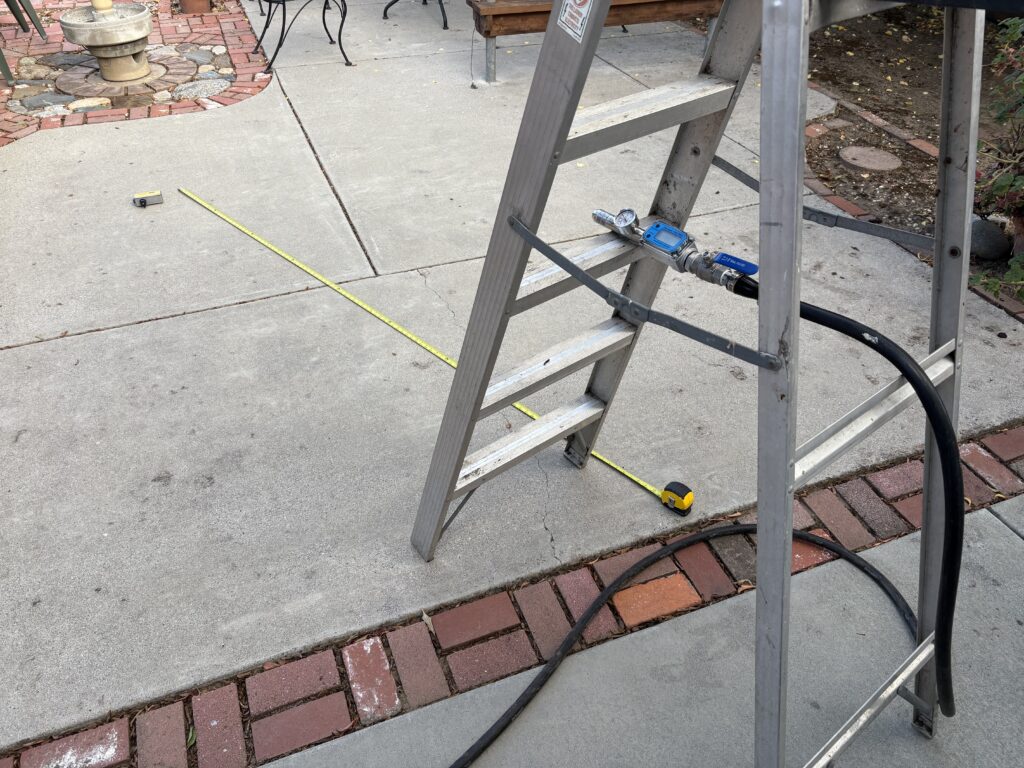
☔ Adventures in IPX5 Testing
Some types of environmental tests require tens or hundreds of thousands of dollars of expensive equipment, highly trained technicians, and tightly controlled test environments. Other types of tests require some guy or gal with an expensive hose nozzle and an empty parking lot. As it turns out, IPX5 testing is the second kind of testing, and is a great candidate for some DIY reliability testing at home.
The first digit in an IP rating stands for the dust ingress protection level, and the second letter stands for the water ingress protection level. An IP65 rated design has a dust ingress protection level of 6 (dust-proof), and a water ingress protection level of 5 (robust to low-pressure water jets from any direction). If either digit is an X, it means that the corresponding protection level is not being tested or addressed in that particular rating; IP6X is a dust-only protection rating, and IPX5 is a water-only protection rating. Generally, an IP65 design can be qualified by performing an IPX5 test only, since if the enclosure is robust to low pressure water jets, it is considered dust-proof by default (water ingress is the harder test to pass).
There is a large quantity of IP65 test reports like this one available on the internet from various manufacturers showcasing the environmental ratings of their products. These test reports make it easy to discern the contents of the IEC 60529 standard that defines tests for ingress protection levels without needing to actually purchase the standard, which would normally run you a cool $663 at the ANSI webstore. There’s also a handy guide to IP ratings on the wikipedia page, with some numeric values that are helpful for calibrating equipment.
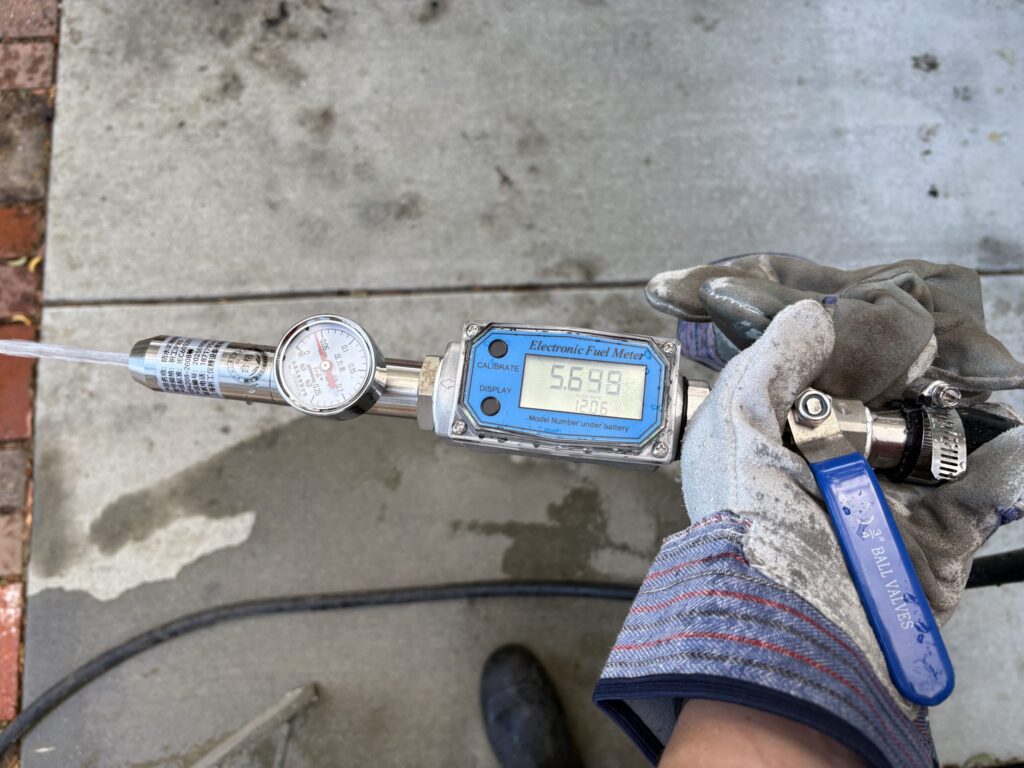
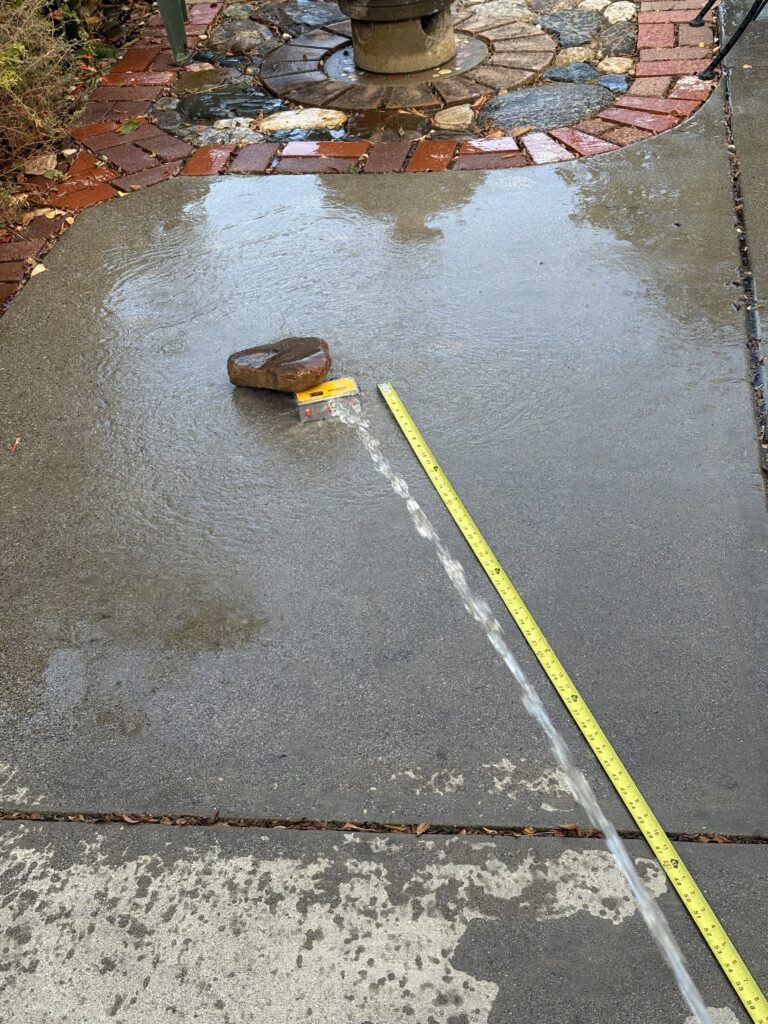
At the end of the day, the IP65 test boils down to spraying an enclosure with 12.5 L/min of water from a 6.3mm diameter hose nozzle operating at a pressure of 30kPa, from 3 meters away. The enclosure should be sprayed for at least 1 minute per square meter of enclosure area, for a minimum of three minutes (for small devices, this means being sprayed for 3 minutes; very large devices need additional time under the hose). This set of requirements is very specific, but can be easily achieved by purchasing a waterproof testing hose nozzle like this one and connecting it to a standard garden hose. Adjust the ball valve till the desired pressure and flow rate are reached, use a tape measure to space your device the proper distance away, and presto! IPX5 testing to your heart’s content.
IPX5 testing of the GS3M PoE enclosure did yield a few valuable insights! Waterproofing seals can be rather particular about their torque specs, and PEM standoffs, despite being molded directly into aluminum sheets by a hydraulic press, do not form a waterproof seal (PEM has a new series of studs and standoffs that are waterproof to IPX9K, but the studs aren’t common and the standoffs haven’t been released yet). Fortunately, a bit of RTV on the inside of an enclosure with PEM standoffs installed seems to do the trick.
For sensing whether water has entered an enclosure, I found water sensitive stickers to be very helpful. A pattern of water sensitive stickers around key ingress points would usually be enough to show what was entry point was leaking (as long as I didn’t shake the enclosure around too much after completing the test). An infrared camera was also somewhat useful for finding water ingress, since there was a noticeable temperature differential between the enclosure (room temperature) and the water (cold). Interestingly, the biggest issue with using a thermal camera was the reflectivity of the aluminum enclosure itself. On a thermal camera, the aluminum box looks like an infinite mirror cube, which can make it somewhat difficult to pinpoint a leak. For a more sensitive test, specialized colorimetric developer spray can be used to coat the inside of an enclosure with color changing paint (removeable) that turns green when exposed to water.
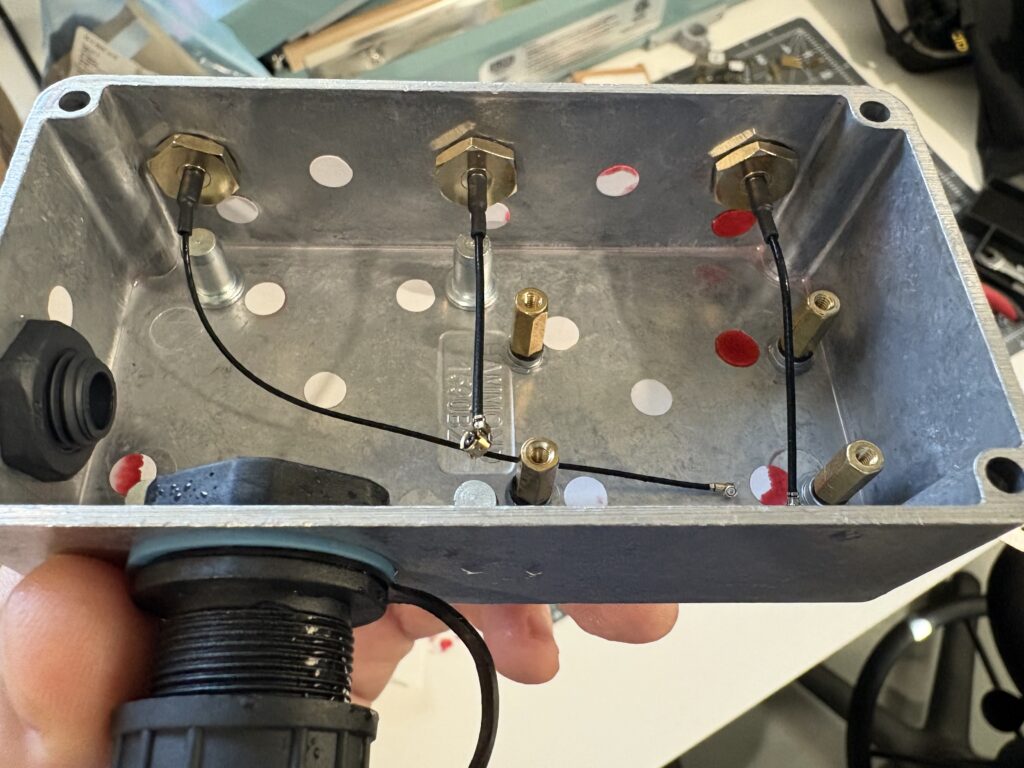
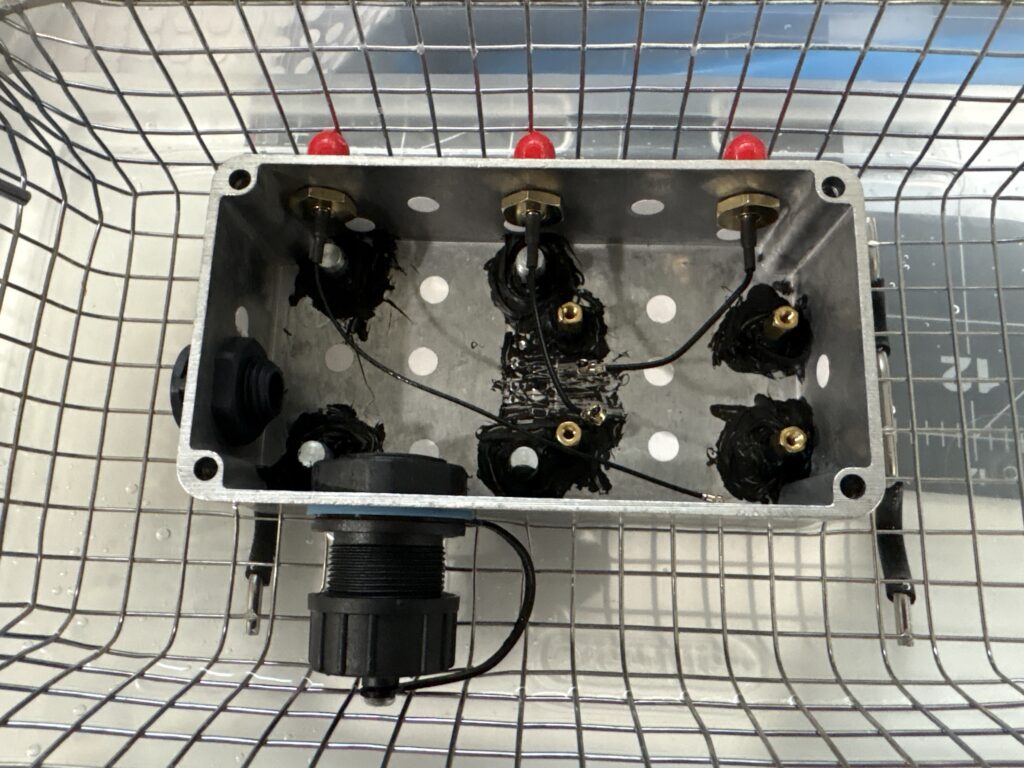
I’m happy to say that after a few tweaks, the GS3M PoE enclosure is passing IP65!
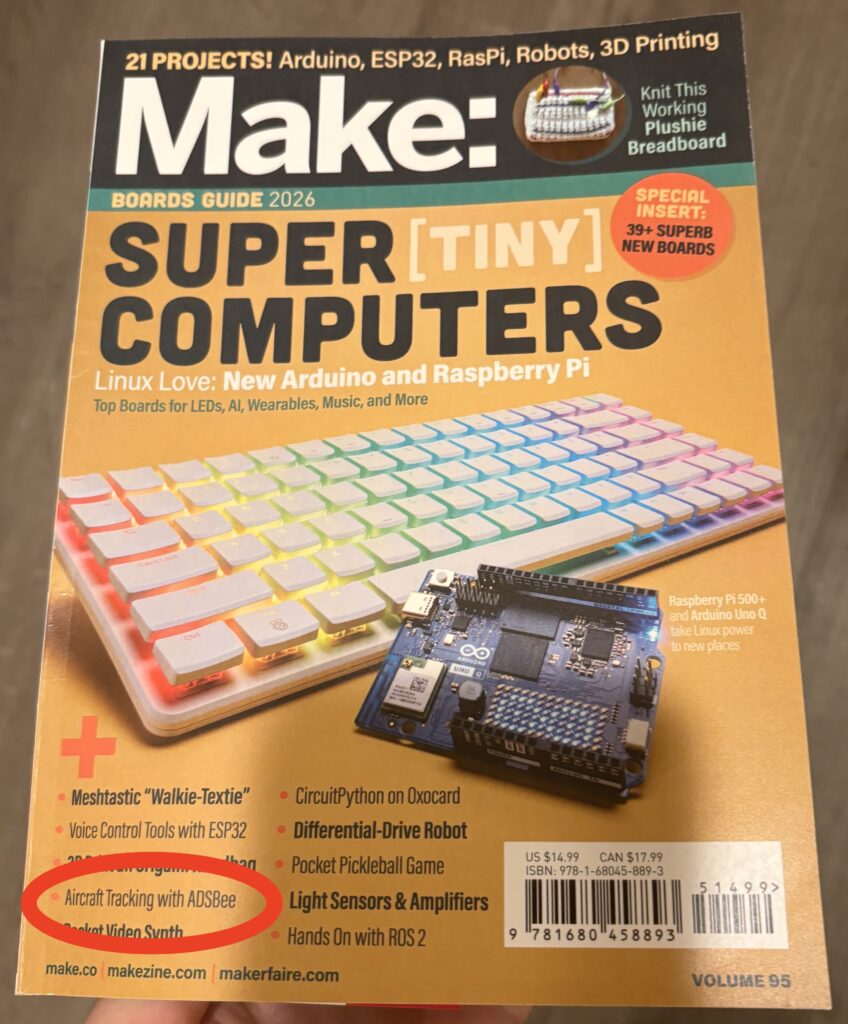
ADSBee in Make Magazine
I’m delighted to announce that ADSBee was featured in Volume 95 of Make Magazine! Special thanks to our community members who contributed photos of their projects to the article. It’s a fun read, so I’ve attached a PDF of the proof I received (including a few typos that were fixed in the final edition). As the owner of a copy of Volume 95 of Make Magazine, I can say that it’s a very cool read–I recommend picking up a copy if you have the chance!
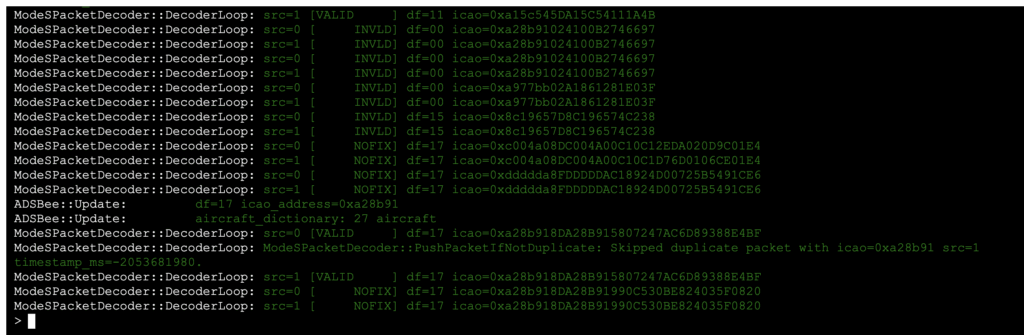
💾 Firmware Updates
We’re still cooking on firmware version 0.9.0! As of the time of writing this blog post, firmware version 0.9.0-rc2 is live, with some cool usability improvements like colored text in the web terminal. There’s still a number of bug fixes and additional features in the pipeline for 0.9.0 stable, so stay tuned for the next few release candidates! We should have a stable dual band release by mid-November.